I hate being surrounded by material things. As a nature admirer, I would rather spend my relaxing time around colorful plants like poinsettias.
So, instead of buying a bunch of poinsettia plants, I opted to grow them from cuttings.
Renowned for their bold, colorful bracts, poinsettias are often associated with Christmas celebrations.
This flowering plant thrives in well-drained soil and prefers bright, indirect light and warm temperatures. Though it is easy to start poinsettias from cuttings, you must provide basic care, such as moderate watering, steady warmth, and plenty of light.
These tropical shrubs have sturdy, upright stems covered with large, deep green leaves and topped with showy red, pink, white, or marbled bracts that are often mistaken for flowers.
Propagating plants from cuttings is a budget-friendly and reliable way to produce new plants that are identical to the parent plant.
You don’t need to buy a new plant every year, and you can even share rooted cuttings with friends and family. Just check the plant tag first, because New Mexico State University Extension notes that propagating a poinsettia protected by a plant patent is not legal.
Compared to growing from seed, the stem-cutting method ensures faster growth and true-to-type colors. At the same time, it helps older plants rejuvenate by encouraging fresh, bushy growth after pruning.
Propagating through cuttings requires little effort and has a high success rate when done at the right time. Purdue University Extension research also shows that dipping the stem base in rooting hormone improves rooting uniformity.
In this write-up, you’ll find a detailed guide on how to start poinsettias from cuttings.
To grow poinsettia from cuttings, take a 4–6 inch stem cutting just below a leaf node in late spring or early summer, remove the lower leaves, dip the cut end in rooting hormone, and plant it in a light, well-draining mix.
Keep it warm (70–75°F) and humid in bright, indirect light, and roots will form in about 3–5 weeks.
Once the roots are strong, move the new plant to a slightly larger pot and water it only when the top inch of soil feels dry.
Things to Know Before Taking Poinsettia Cuttings
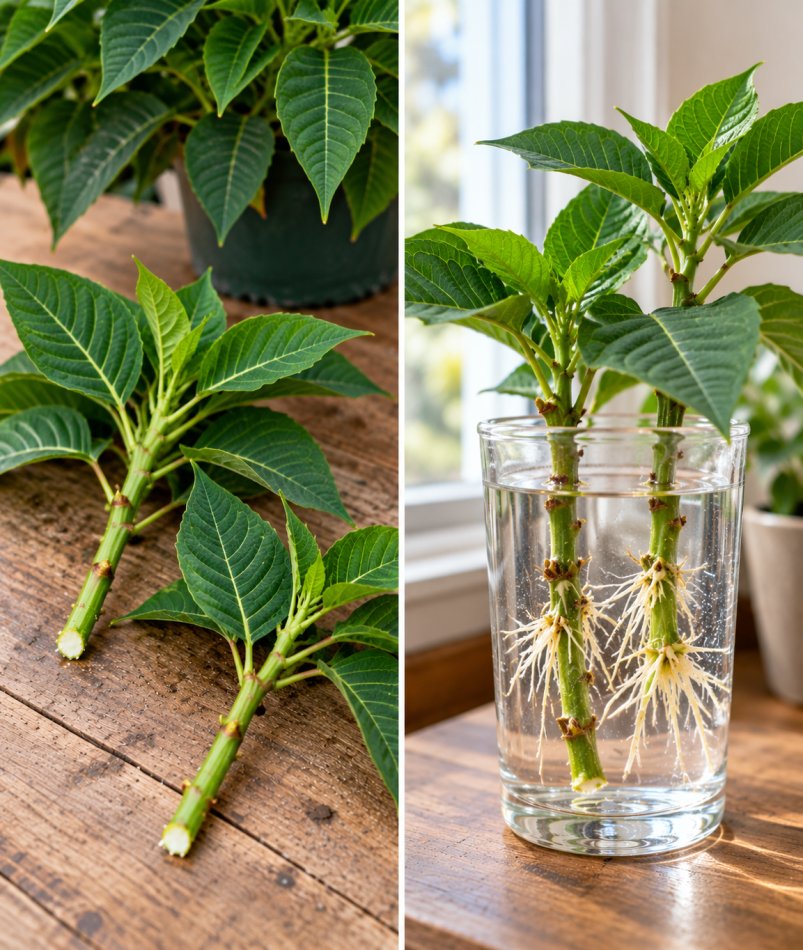
Before you start, there are a few important things to keep in mind when working with poinsettias.
Poinsettia stems release a milky white sap (latex) when cut. This sap can irritate sensitive skin and eyes, so it’s a good idea to wear gloves and avoid touching your face while handling the plant.
The sap can also be mildly irritating to pets if they chew on the plant, so keep your cuttings out of their reach.
Also, the sap can clog the cut end of the stem and stop it from absorbing water or rooting hormone. Rinsing the cut end gently under lukewarm water helps stop the flow and keeps the stem open for root development.
Also Read: 27 Ideas for Decorating with Poinsettias for Christmas
How to Propagate Poinsettia from Cuttings in Soil?
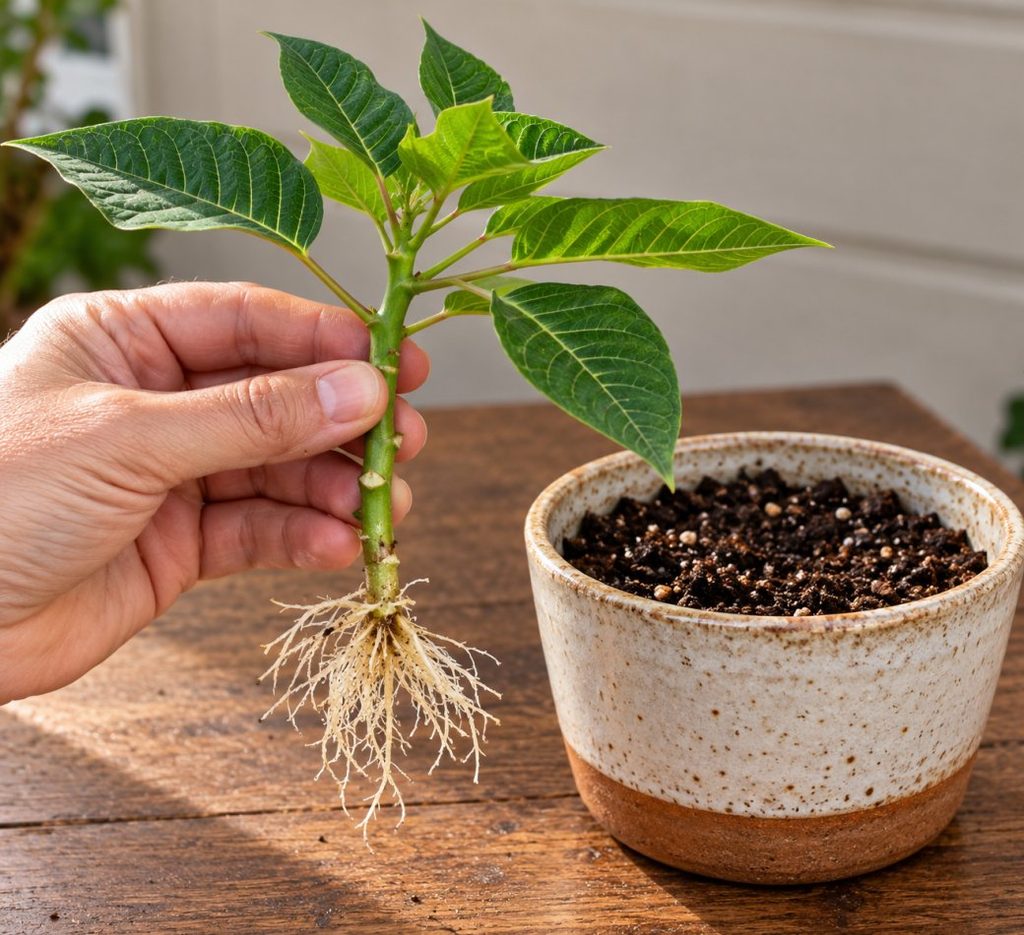
Propagating poinsettia through stem cuttings in soil is the most reliable method and gives you the highest chance of success. It does not require fancy equipment, and with the right technique, you can have new roots forming in just a few weeks.
Follow this step-by-step guide to propagate poinsettias from cuttings successfully.
Step 1: Choose a Healthy Poinsettia Plant
To start, select a healthy poinsettia with strong stems and glossy, deep green leaves. Avoid plants with yellowing leaves, spotted foliage, or signs of pests, as unhealthy plants may not produce strong new growth.
Look for fresh, new growth that is firm but not woody. A cutting from an actively growing stem will have the best chance of rooting.
Step 2: Take the Cutting
- Use a sharp, clean knife or pruning shears. Sterilize the blade with rubbing alcohol before cutting to prevent infections.
- Take a cutting that is 4–6 inches long with at least three to four leaves.
- Cut at a 45-degree angle just below a leaf node (the point where leaves grow from the stem). This is where roots will develop.
- Remove any flowers, bracts, or buds so the cutting can focus its energy on growing roots.
- Trim off the lower leaves, leaving two to three healthy leaves at the top.
If the leaves are very large, you can cut them in half to reduce moisture loss while the cutting is rooting.
Check this: How to Make Poinsettias Bloom?
Step 3: Stop the Sap Flow
Unlike many other plants, poinsettia cuttings should not be left out to dry for long. The sap needs to be stopped, but the stem should remain fresh.
- Dip the cut end of the stem in lukewarm water for a minute or two.
- Gently pat it dry with a clean paper towel.
- Wait a few minutes until the sap stops dripping before moving on to the next step.
Step 4: Prepare the Pot and Soil
Poinsettias grow best in light, airy soil that holds a little moisture but drains quickly. A mix of peat moss and perlite or coarse sand works well.
- Choose a small pot, about 3–4 inches wide, with drainage holes to prevent over-watering.
- Fill the pot with a light, well-draining potting mix.
- Moisten the soil lightly so that it is damp but not soggy.
Step 5: Plant the Cutting
- Make a small hole in the soil using a pencil or your finger.
- Dip the cut end of the stem in rooting hormone powder or gel to encourage faster root growth. This step is highly recommended for poinsettias.
- Insert the cutting into the hole, making sure at least one or two nodes are under the soil.
- Gently press the soil around the cutting to hold it upright.
You can plant several cuttings in one larger pot, keeping them about two inches apart, and separate them once they have rooted.
Step 6: Create a Humid, Warm Environment
Poinsettia cuttings need warmth and humidity to root well.
- Cover the pot loosely with a clear plastic bag or a clear plastic dome. Use sticks or pencils to keep the plastic from touching the leaves.
- Place the pot in a warm spot where the temperature stays between 70°F and 75°F.
- Open the cover for a few minutes every day to let fresh air in and prevent mold.
A heat mat placed under the pot can speed up rooting, especially in cooler rooms.
Step 7: Care for the Cutting
Proper care is essential for the cutting to develop strong roots.
- Place the pot in bright, indirect sunlight. Avoid direct sun, as it can scorch the leaves and dry out the cutting too quickly.
- Keep the soil lightly moist but never wet. Over-watering is the most common reason poinsettia cuttings fail.
- Mist the leaves occasionally if the air in your home is dry.
Step 8: Wait for Roots and Transplant
Poinsettia cuttings usually take about three to five weeks to develop roots. To check for roots:
- Gently tug on the cutting after three weeks. If you feel resistance, roots are forming.
- If the cutting pulls out easily, give it more time.
- New leaf growth at the top is also a good sign that roots have formed.
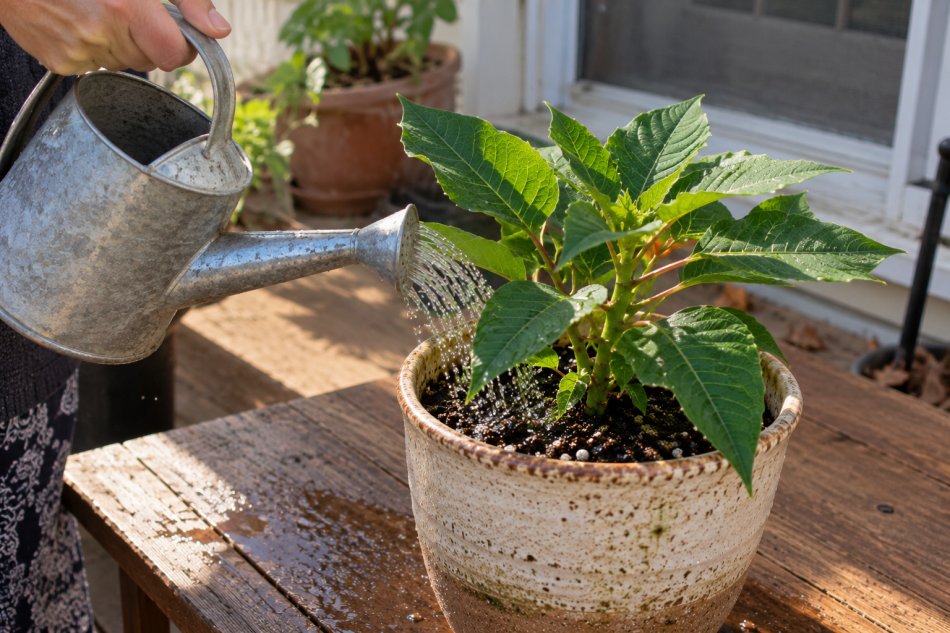
Once the cutting has a strong root system, move it to a slightly larger pot filled with fresh, well-draining potting mix. Water it lightly and keep it in bright, indirect light for a week before moving it to a sunnier spot.
How to Propagate Poinsettia from Cuttings in Water?
Propagating poinsettias in water allows you to watch the roots develop before moving the new plant into soil.
It is a simple method for beginners, though it has a slightly lower success rate than soil propagation because poinsettia stems are prone to rot.
Taking the Cutting
Choose a healthy stem about four to six inches long and cut it just below a leaf node using sharp, sterilized scissors.
Remove the lower leaves, since any leaves sitting in water can rot and encourage bacteria. Keep two or three leaves at the top, and remove any bracts or buds.
Rinse the cut end under lukewarm water to stop the sap from flowing.
Preparing the Water
Fill a clean glass jar or bottle with room-temperature water. Let tap water sit for a few hours first so the chlorine can evaporate.
Place the cutting in the jar so that the lower node is under the water, but keep the leaves above the water line.
Providing the Right Conditions
- Keep the jar in a warm, bright spot with indirect sunlight, like a windowsill that does not get harsh afternoon sun.
- Change the water every two to three days to keep it fresh and prevent bacteria.
- Keep the room temperature steady, ideally between 65°F and 75°F.
In about three to four weeks, small white roots should start growing. Once the roots reach one to two inches long, the cutting is ready to be planted in soil.
Moving the Rooted Cutting to Soil
Fill a small pot with a light, well-draining mix, make a hole in the center, and place the cutting inside. Gently cover the roots with soil and press lightly.
Water it just a little to help it settle. Water-grown roots are more delicate than soil-grown roots, so keep the plant out of direct sun for the first week and keep the soil evenly moist while it adjusts.
When is the Best Time to Take Poinsettia Cuttings?
The best time to take poinsettia cuttings is in late spring to early summer, when the plant is actively growing and has produced plenty of fresh, new shoots.
After the holiday season, most poinsettias drop their bracts and go through a resting period. Around April or May, you can cut the plant back to about four to six inches and start watering and feeding it again. Within a few weeks, the plant will produce new shoots that are perfect for cuttings.
Taking cuttings in the middle of winter or when the plant is dormant is not recommended, as the cuttings may take much longer to root or fail altogether.
Also Read: 29 Different Types of Poinsettia Plants
How Long Does it Take for Poinsettia Cuttings to Root?
Poinsettia cuttings usually take about three to five weeks to develop roots, depending on the growing conditions.
Warm temperatures (70–75°F), high humidity, bright indirect light, and the use of rooting hormone all help speed up the process.
Cuttings kept in cool rooms below 65°F may take much longer to root or may rot before they form roots.
Patience is key, as some cuttings may take longer, but with the right environment, most will successfully root and grow into healthy plants.
How to Care for Poinsettia Plants After Rooting?
Once your cuttings have rooted, proper care will help them grow into full, bushy plants that are ready to color up by the holidays.
Light Requirements
Poinsettias need at least six hours of bright, indirect light daily. A spot near an east or south-facing window is ideal. Direct afternoon sun in hot weather can scorch the leaves, so provide a little shade if needed.
Watering Routine
Water your poinsettia when the top inch of the soil feels dry to the touch. Water thoroughly until it drains from the bottom, and then empty the saucer so that the roots do not sit in water.
Both over-watering and under-watering can cause leaves to droop and drop, so keep the soil evenly moist but never soggy.
Temperature and Humidity
Poinsettias prefer daytime temperatures of 65–70°F and night temperatures that do not fall below 60°F. Keep them away from cold drafts, heating vents, and air conditioners, as sudden temperature changes can cause leaf drop.
Temperatures below 50°F can damage the plant, so bring potted poinsettias indoors well before the cold sets in.
Fertilizing for Healthy Growth
Wait until the cutting has well-established roots and new leaves before you start feeding it. Then feed the plant with a balanced liquid fertilizer every two to three weeks during the growing season.
Stop feeding once the bracts begin to show color in the fall.
Pinching for a Bushy Shape
When the young plant has grown to about six inches tall, pinch off the tips of the new shoots just above a leaf node. This encourages the plant to branch out and form a fuller shape with more bracts later.
You can pinch every few weeks until late summer, but stop by early September so that the plant has time to set its colored bracts.
Re-potting
When the roots fill the pot, move the plant to a container that is one size larger, usually about 6–8 inches wide. Use a fresh, light potting mix and make sure the pot has good drainage.
How to Get Your Poinsettia Cuttings to Color Up Again?
Getting a poinsettia to produce colorful bracts again is the trickiest part. Poinsettias are short-day plants, which means they need long, uninterrupted nights to trigger color change.
Starting in late September or early October, give your plant 12 to 14 hours of complete darkness every night for about eight to ten weeks. You can place it in a closet or cover it with a large cardboard box in the evening.
During the day, move it back to a bright, sunny spot with temperatures around 65–70°F.
Even a small amount of light at night, such as a lamp or streetlight, can delay or stop bract coloring, so be consistent. Once the bracts show full color, you can stop the dark treatment and display your plant.
Common Problems When Growing Poinsettia from Cuttings
Poinsettia cuttings can run into a few problems, but most are easy to prevent.
- Cutting turns black or mushy: This is usually caused by over-watering or a lack of air circulation. Use a well-draining mix, water lightly, and open the plastic cover daily.
- Leaves wilt after planting: A little wilting is normal in the first few days. Keep humidity high and avoid direct sun.
- No roots after several weeks: The room may be too cool. Move the cutting to a warmer spot and use a heat mat if possible.
- Yellowing leaves: This can be caused by too much water, low light, or cold drafts.
- Pests: Whiteflies, aphids, spider mites, and fungus gnats can affect poinsettias. Check the leaves regularly and treat early with insecticidal soap or neem oil.
Important Tips Before Starting Poinsettia from Cuttings
- Choose a Healthy Parent Plant – Always take cuttings from a strong, disease-free poinsettia with vibrant leaves and no signs of pests.
- Use Sharp, Sterilized Tools – Clean cutting tools prevent infections and ensure a clean cut, helping the cutting root faster.
- Wear Gloves – The milky sap can irritate skin and eyes, so protect yourself while handling the plant.
- Take Cuttings at the Right Time – The best time is late spring to early summer when the plant is actively growing.
- Use Rooting Hormone – Poinsettias root much more reliably when the cut end is dipped in rooting hormone.
- Choose the Right Growing Medium – Use a light, well-draining mix of peat and perlite to prevent rot.
- Provide Warmth and Humidity – Keep cuttings at 70–75°F under a loose plastic cover and in bright, indirect light.
- Avoid Over-watering – Keep the soil lightly moist, never soggy, to prevent stem and root rot.
Check this: 20 Christmas Tree Alternatives to Try
Conclusion
Growing poinsettias from cuttings is an easy and cost-effective way to create new plants and enjoy them year after year.
With the right care—choosing a healthy stem, taking the cutting at the right time, and providing warmth, humidity, and light—cuttings will root and thrive.
In just a few weeks, you’ll have strong, healthy young poinsettias, and with a little patience and the right dark treatment, they will reward you with colorful bracts in time for the holidays.


Khaja Moinuddin, a computer science graduate, finds joy in gardening and homesteading. Join him on this blog as he shares his experiences in homesteading, gardening, and composting