Drying is an efficient way to preserve your harvest all year round.
The practice of drying herbs dates back to ancient times, when people regarded herbs as a gift from God and valued them for their medicinal properties.
There are different ways to dry fresh herbs, and the best one depends on the herb you choose.
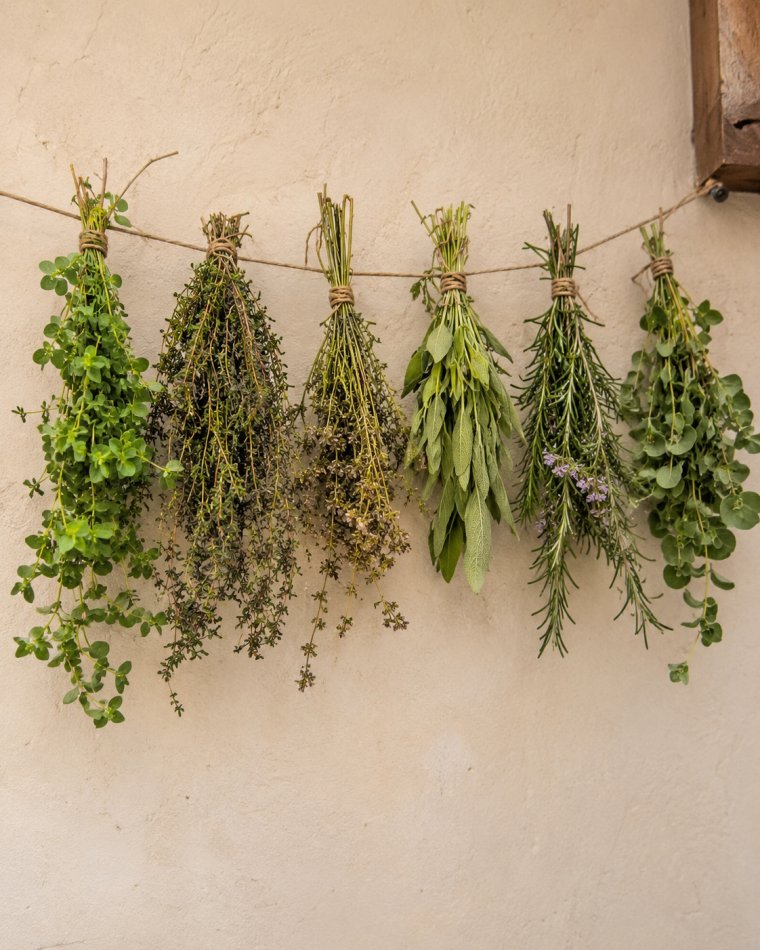
For instance, woody herbs like rosemary, thyme, oregano, and sage are ideal for hanging. You need to tie small bunches of herbs, hang them upside down in a warm, dry, airy spot away from direct sun, and wait one to two weeks.
Moist herbs like basil and mint can turn dark or moldy when air dried, so use a low oven or dehydrator instead.
When the leaves crumble easily, store them in airtight glass jars in a cool, dark place.
How to Prepare Herbs Before Drying?
Herbs from your own garden are fresher and cleaner than store-bought ones, and you know exactly how they were grown. They also hold more flavor, which makes a big difference once they are dried.
Harvest in the mid-morning, after the dew has dried but before the afternoon sun gets strong. Cut the stems just before the plant starts to flower, when the oils are at their peak.
Never take more than one-third of the plant at a time. This keeps it healthy so it can keep growing.
Once you bring the herbs inside, a little preparation goes a long way.
Also Read: How to Can Fresh Tomatoes?
1. Shake off dirt and insects
Gently shake the stems outdoors to knock off loose soil, bugs, and debris. Then check the leaves and stem undersides closely, since aphids and spider mites hide there. Pick off any you find by hand.
2. Remove damaged leaves
Remove any yellow, spotted, wilted, or holey leaves, since they can spoil the batch and bring mold into the jar. Trim the bottom few inches of each stem, where leaves are often dirty or damaged.
3. Rinse only if needed
If the herbs are dusty or dirty, rinse them briefly in cool water. Hold them by the stems and swish them gently instead of soaking them.
If they look clean, skip this step. Extra moisture slows drying and can cause mold. This is the reason many gardeners avoid washing herbs that were grown in clean, mulched beds.
4. Dry them completely
Pat the stems dry with a clean towel, then rest them on a dry cloth for an hour or two. Check where leaves meet the stem, since water collects there. In humid areas, give them extra time.
5. Sort by type
Separate woody herbs like rosemary and thyme from moist ones like basil and mint, since they need different drying methods and dry at different speeds.
3 Ways to Dry Fresh Herbs
Fresh herbs from your own garden are on another level. The smell alone can make a simple meal feel special.
Drying them the right way keeps that magic going long after the season ends.
1. Traditional Hanging
This is the method most people picture. You tie a small bunch of herbs together and hang it up to dry.
Use a rubber band instead of string. As the stems shrink, the rubber band tightens with them, so your herbs don’t slip out and fall on the floor.
Keep the bunches small, about five to ten stems. Big bunches hold moisture in the middle and can turn moldy.
Hang them upside down in a warm, dry, airy spot away from direct sun. Sunlight fades the color and weakens the flavor.
Most bunches dry in one to two weeks. This method works best for woody herbs like rosemary, thyme, oregano, and sage.
Where it comes from: Hanging herbs is one of the oldest drying habits. Ancient Egyptians dried herbs for food, medicine, and other uses. Later, kitchens and monasteries in Europe hung bundles from rafters and beams.
No single person is known to have invented it. It simply grew out of everyday life. (Source)
Also Read: How to Pickle Cucumbers with Vinegar and Sugar?
2. Flat Drying on a Towel
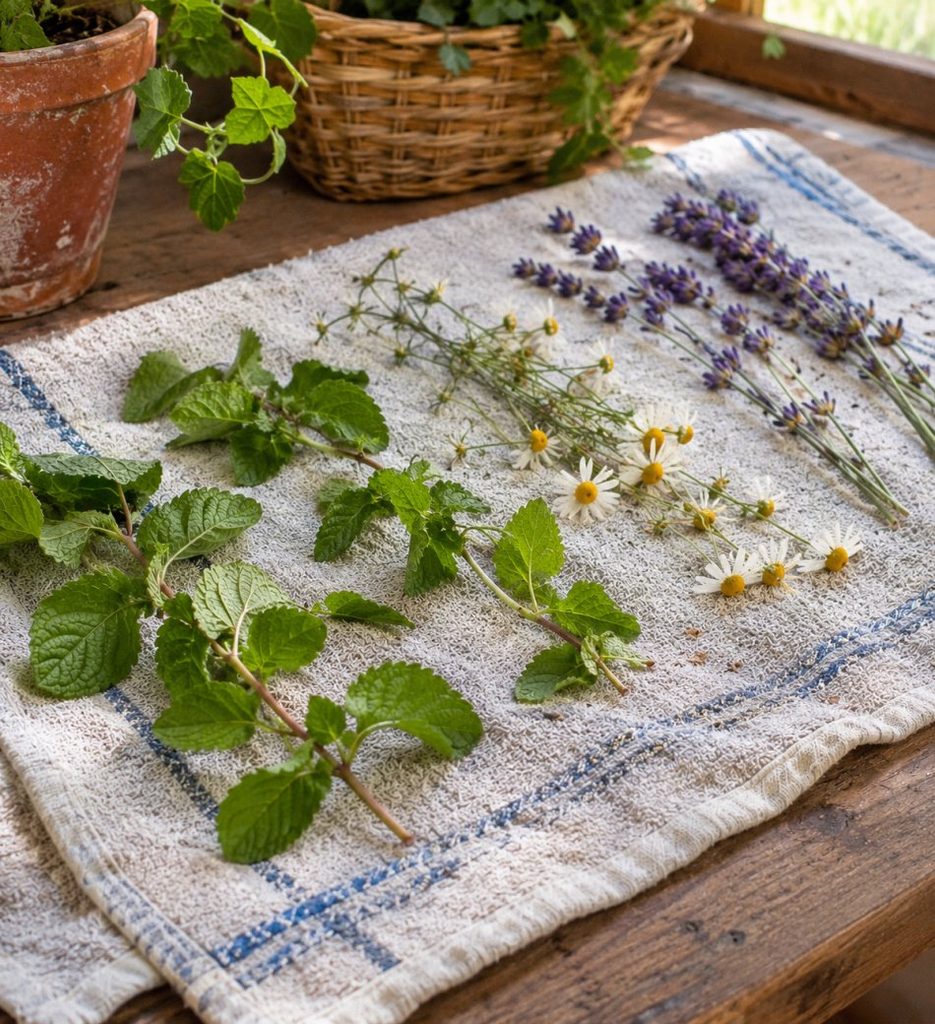
Here you skip the bunching. Lay the herbs in a single layer on a clean, dry towel.
Leave a little space between the stems so air can move around them. Put the towel in a dry, shaded spot indoors.
Turn the herbs once or twice so they dry evenly. If you need the space, just roll up the towel and move it.
This method is gentle, so it suits tender leaves and flowers like mint, lemon balm, chamomile, and lavender. It takes about a week or a little longer.
Where it comes from: Spreading plants on flat surfaces to dry is also very old. In many parts of Asia, people have long dried medicinal leaves and flowers on mats and trays in the shade.
Again, no one person gets the credit. It is a method that many cultures found on their own. (Source)
3. Bowl Drying
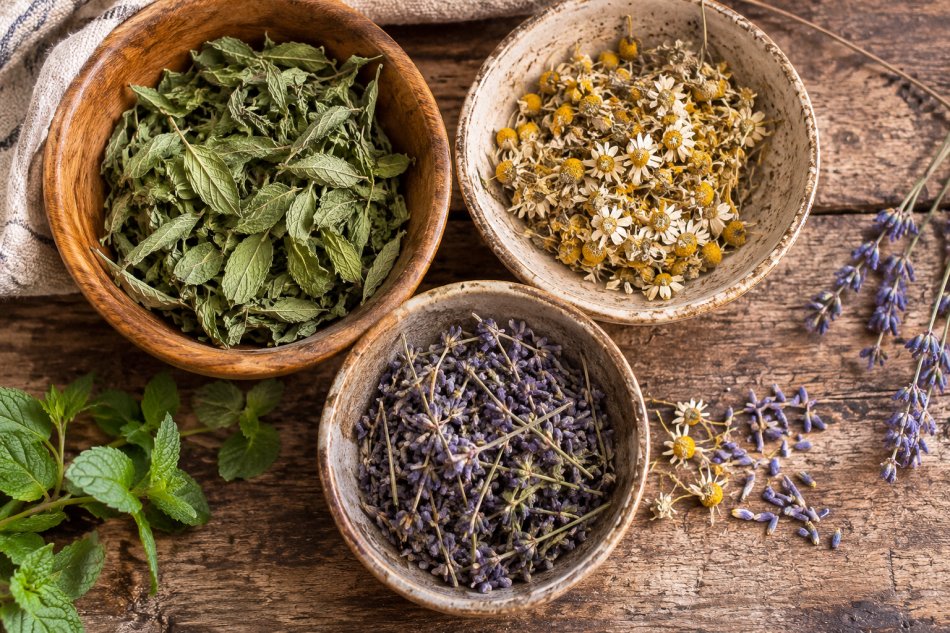
This is the easiest method, and it’s my favorite for everyday use. Pull the leaves off the stems and drop them into a bowl.
Stems carry moisture to the leaves, so removing them speeds up drying. Small herbs like marjoram can go in the bowl with the stems still on.
Keep the bowl in a dry, shaded spot. Stir the leaves every day or two so they dry evenly and don’t get damp at the bottom.
After about a week, the leaves turn crackly. Run your fingers down the stems and the dried leaves fall right off.
This works well for basil, marjoram, oregano, and mint. You can even do it in front of the TV.
Where it comes from: This one has no known ancient origin. It is a simple home method that herb growers have passed along, and it is a favorite of herb gardener Ann McCormick, who uses it most of the time.
Whichever method you pick, store the dried leaves in an airtight container. Add a label with the herb’s name and the month and year you harvested it. (Source)
Other Ways to Dry Your Herbs
Air drying is simple, but it isn’t always the best choice. In humid weather or with moist herbs like basil and mint, slow drying can lead to mold.
That’s when an oven or a dehydrator comes in handy. Both dry herbs faster and give you more control.
Must Read: 5 Simple Ways to Store Carrots from the Garden
4. Drying Herbs in the Oven
The oven is a good option if you don’t own a dehydrator. It works well for moist herbs like basil, mint, and lemon balm.
Strip the leaves from the stems and spread them in a single layer on a baking sheet. You can line the sheet with parchment paper to keep the leaves from sticking.
Set the oven to its lowest setting, ideally around 170°F or less. Prop the door open slightly so moisture can escape.
Check the herbs every 30 minutes. Most batches take two to four hours.
Watch them closely near the end. Herbs can go from dry to scorched fast, and burnt leaves taste bitter.
5. Drying Herbs in a Dehydrator
A dehydrator is the most reliable way to dry herbs. It holds steady, low heat, so the color, aroma, and oils stay in the leaves.
Place the leaves on the trays in a single layer. Leave a little space between them so air can flow evenly.
Set the temperature between 95°F and 115°F. Most herbs dry in one to four hours, depending on the herb and the humidity.
Tender herbs dry faster than thick, woody ones. Check the trays every hour and take off the leaves that are done.
Once the leaves feel brittle and crumble easily, let them cool completely before you store them. Warm leaves can trap moisture in the jar.
How to Know Your Herbs Are Fully Dried?
The leaves should feel brittle and crumble easily when you rub them between your fingers. If they bend or feel soft, they need more time.
Check the stems too. They should snap cleanly instead of flexing.
Let the herbs cool completely before you store them. Warm leaves can trap a little moisture inside the jar.
This step matters more than it seems. Even a small amount of leftover moisture can cause mold, and one moldy batch can ruin the whole jar.
How to Store Dried Herbs?
Pack your dried herbs in airtight glass jars. Glass doesn’t hold smells and keeps moisture out better than most plastic containers.
Store the jars in a cool, dark place like a pantry or kitchen cabinet. Light and heat break down the oils that give herbs their flavor, so avoid keeping jars next to the stove or on a sunny shelf.
Keep the leaves whole. Crush them only when you are ready to cook, because whole leaves hold their aroma much longer.
Pull the leaves off the stems and fill the jar, but don’t pack them too tightly. Close the lid right away.
Always add a label with the herb’s name and the month and year you dried it. Many dried herbs look alike, so labels save you from guessing later.
Check the jars after a few days. If you see any moisture or fog on the glass, the herbs weren’t fully dry. Take them out and dry them again.
Common Mistakes to Avoid
A few small mistakes can ruin a good harvest, so keep these in mind.
- Drying in direct sun. Sunlight fades the color and weakens the flavor.
- Using too much heat. High temperatures scorch the leaves and make them bitter.
- Bunching too many stems. Large bundles hold moisture in the middle and can turn moldy.
- Storing herbs too early. Leaves that are still slightly damp will mold in the jar.
- Crushing the leaves before storing. Whole leaves keep their flavor much longer.
Can you dry herbs in the microwave?
Yes, for small batches. Dry them between paper towels in 30-second bursts, and watch closely so they don’t scorch.
Should you wash herbs before drying?
Only if they are dusty or dirty. If you do, pat them completely dry first, since extra moisture slows drying and can cause mold.
How long do dried herbs last?
Stored properly in airtight jars away from light and heat, they stay flavorful for one to three years. After that they are safe to use, but the flavor fades.
Conclusion
Drying herbs is one of the simplest ways to enjoy your garden long after the season ends. Whether you hang them, lay them flat, or let them dry in a bowl, the goal is the same: remove the moisture and keep the flavor.
Pick the method that suits your herbs and your climate, store them with care, and label every jar.
A little effort now means a kitchen full of homegrown flavor all year round.


Khaja Moinuddin, a computer science graduate, finds joy in gardening and homesteading. Join him on this blog as he shares his experiences in homesteading, gardening, and composting