Reusing and recycling are at the heart of sustainable gardening, and building a greenhouse from old windows is one of the most rewarding ways to put those values into practice.
Instead of discarding outdated or damaged windows, you can repurpose them into a functional, charming greenhouse right in your backyard.
Compared to prefabricated greenhouse kits, structures made from reclaimed windows are significantly more affordable and align beautifully with zero-waste living.
While the finish may not resemble professional glazing, the result is a unique, eco-friendly growing space that reflects creativity and personal style.
Whether you grow herbs, flowers, or seasonal vegetables, a DIY greenhouse becomes both a gardening tool and a content-worthy centerpiece for sustainable living inspiration.
Also Read: How to Keep a Greenhouse Warm in Winter?
Benefits of Using Old Windows for a Greenhouse

Old windows offer several practical advantages that make them ideal for greenhouse construction.
Glass naturally retains heat and allows excellent light transmission, creating a warm, sunlit environment that supports early spring planting and extended growing seasons.
Heat-loving plants benefit greatly from this consistent exposure, especially when outdoor temperatures are still unpredictable.
The built-in frames of old windows act as ready-made structural panels. Instead of cutting and fitting sheets of glazing, you simply join window units together and seal them properly. Some windows even come with ventilation panels, making airflow management easier without additional hardware.
Durability is another major plus. Unlike plastic sheeting, glass doesn’t degrade quickly under UV exposure. If a pane breaks, it can be replaced individually without dismantling the entire structure.
From a cost perspective, reclaimed windows are often free or inexpensive. They’re commonly found at demolition sites, renovation projects, salvage yards, or Habitat-style reuse stores. Using them not only saves money but also keeps usable materials out of landfills.
How to Make a Greenhouse from Old Windows?
Instead of seeing a pile of old windows as junk, treat them as ready-made walls waiting to be turned into a cozy plant shelter.
With a simple wooden frame and some basic tools, those discarded frames can become a sturdy, light-filled greenhouse that serves you for years.
Essential things to start
- Choose the right location: Pick a sunny spot that receives at least 6 hours of direct sunlight daily, with level (or level-able) ground and good drainage so water doesn’t collect around the base.
- Gather basic structural lumber: Use 2×4 lumber for wall framing and roof supports, and stronger posts like 4×4s for corners and load-bearing sections.
- Prepare foundation materials: Choose either concrete blocks, pavers, or a gravel bed for a simple base, or build a treated wooden base frame suitable for outdoor use.
- Have essential tools ready: Tape measure, level, carpenter’s square, pencil, saw, drill/driver, and a variety of screws—plus safety gear like gloves, safety glasses, and sturdy footwear.
- Stock fasteners and hardware: Exterior-grade screws for framing, shorter screws for attaching windows, and hinges and latches for doors or vented windows.
- Plan and weatherproof: Sketch basic dimensions, map window placement, choose a roof style (flat, sloped, or peaked), and gather exterior paint, sealant, and optional weatherstripping for insulation.
Once these essentials are ready, the actual step‑by‑step build (framing, attaching windows, adding the roof, then sealing and finishing) becomes much easier and safer, and you’re less likely to get stuck halfway through.
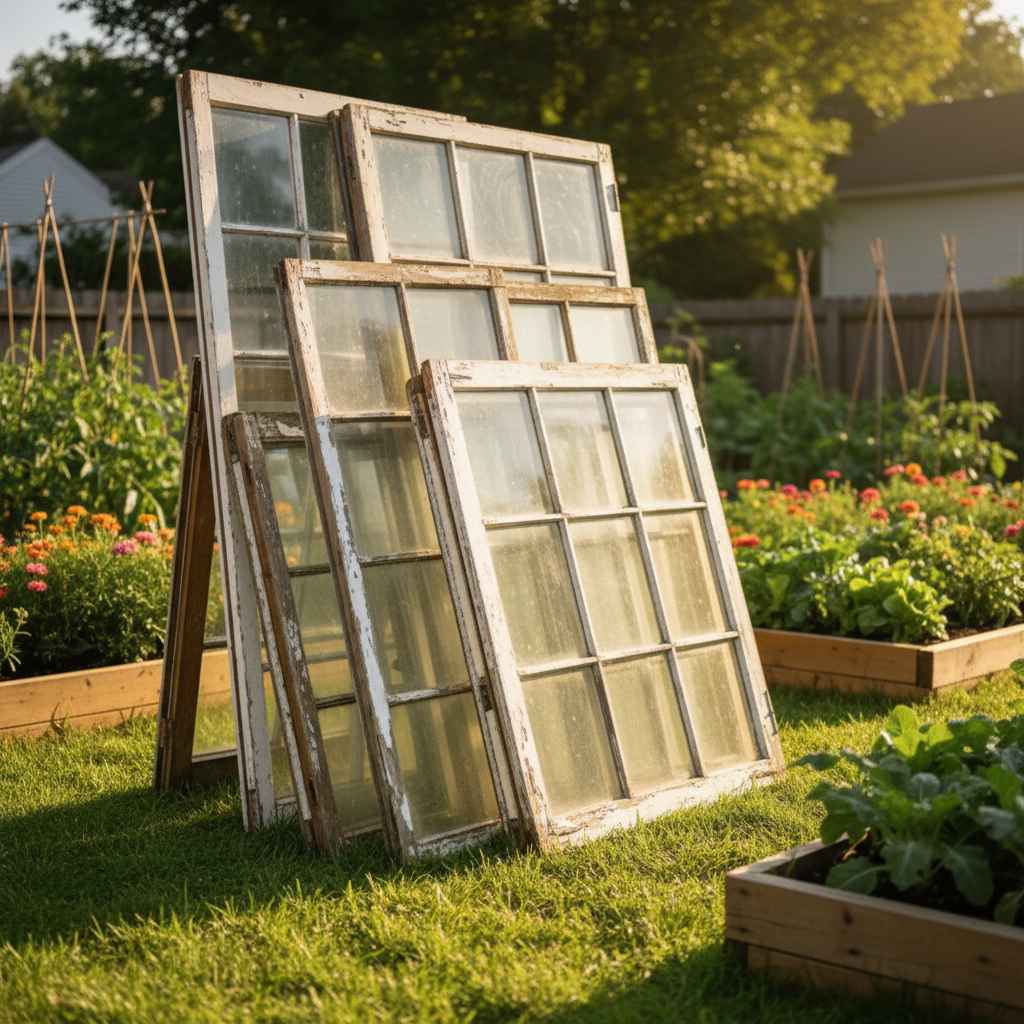
Step:1 Planning and Window Collection
Start by collecting windows gradually. This phase may take weeks or even months, depending on availability. Look for sturdy frames with intact glass and minimal rot. While matching windows make construction easier, slight size variations can be handled with wood framing and trim.
Lay your windows on the ground and experiment with different layouts. Aim to create pairs of walls with similar heights for stability. Small gaps of two to three inches are manageable and can be filled with lumber.
Decide early on whether your greenhouse will be ground-level, raised, or attached to an existing structure. Consider ceiling height for taller plants, airflow needs, and whether you’ll be working inside comfortably.
Step:2 Building the Foundation and Base

A solid foundation is essential for longevity. For lightweight builds, a pallet base works well and keeps window frames elevated from moisture. Raised designs are especially helpful in wet climates.
For permanent ground-level greenhouses, dig corner post holes at least 14 inches deep. Use pressure-treated 4×4 posts for corners and 2×4 lumber for framing. This base forms the skeleton that supports the entire structure, so durability matters.
Ensure the base is level before moving forward. Any unevenness will cause alignment issues when installing windows later.
Also Read: How to Build a Compost Bin with Pallets?
Step:3 Framing the Structure
Begin framing from the base upward. Secure the four corner posts, then add vertical studs along each wall. Window sizes will dictate stud placement, so leave room for adjustments.
Use the windows themselves as templates while framing. Build wall frames that closely match window dimensions, allowing small tolerances for expansion and sealing. One wall should be reserved for the door opening, while another can include vents or exhaust fans.
Temporary bracing helps keep everything square as you work your way up.
Step:4 Installing the Windows
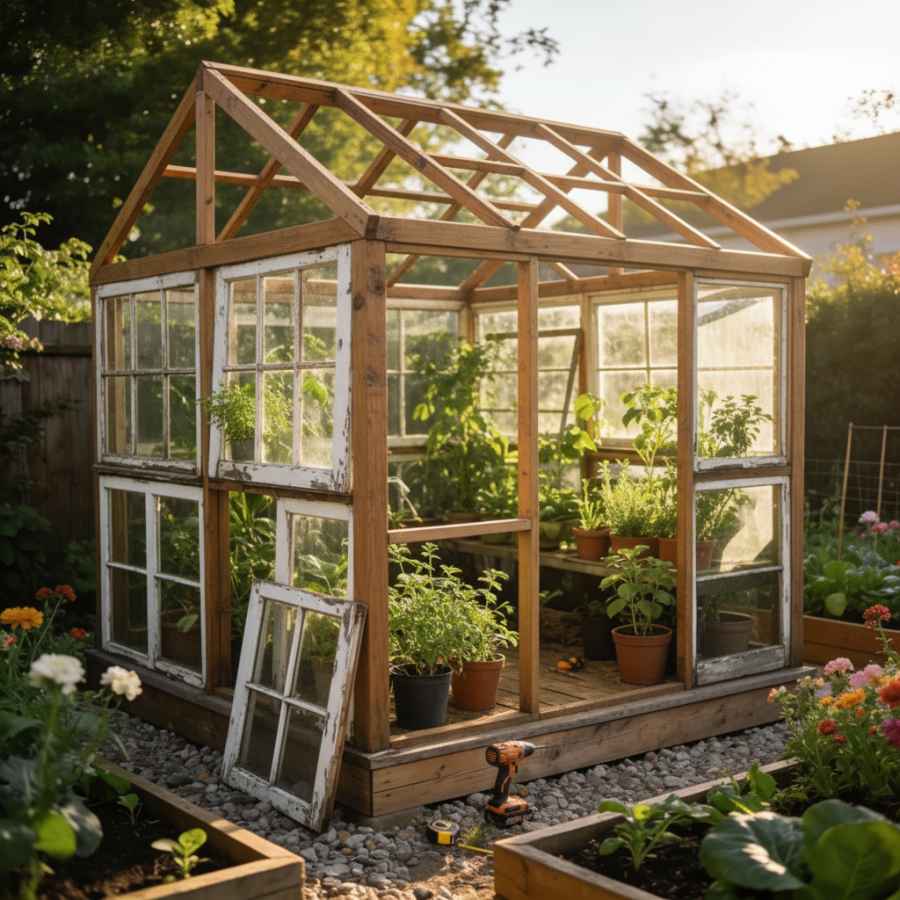
Drill pilot holes through window frames to prevent splitting. Secure each window using self-tapping screws—generally three screws for wide windows and two for narrower ones.
Fit windows tightly to reduce heat loss. Fill small gaps with wood trim, weatherstripping, or exterior-grade sealant. Avoid using cracked or flawed glass, as imperfections can intensify sunlight and scorch plants.
Check alignment frequently to maintain straight walls and even spacing.
Step:5 Constructing the Roof
Build the roof frame on the ground whenever possible. This allows for easier measuring, painting, and sealing. An angled roof improves solar gain during winter and helps rainwater run off efficiently.
Attach roof windows securely and seal all seams against leaks. Adding hinged or removable roof panels improves summer ventilation and temperature control.
Install guttering along roof edges to collect rainwater—an eco-friendly bonus for watering plants.
Check this: How to Keep a Greenhouse Warm in Winter?
Step:6 Finishing Touches and Interior Setup
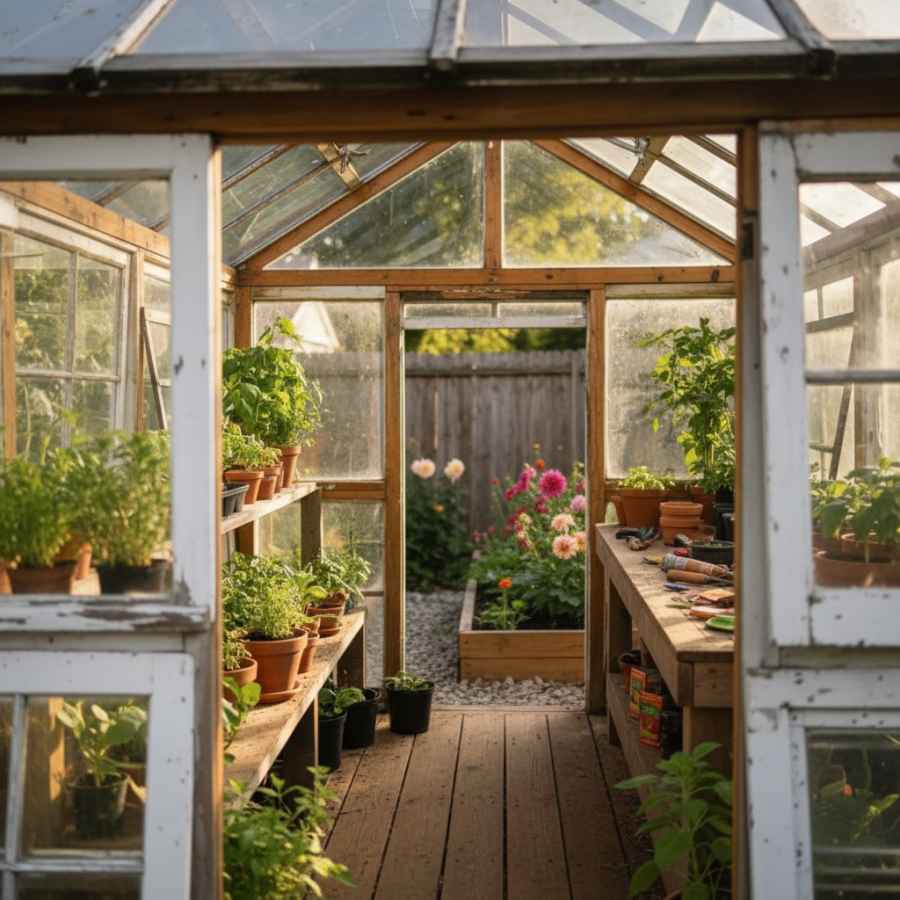
Anchor the greenhouse frame to the base using metal L-brackets. Apply weatherproof sealant around all joints to block drafts and moisture.
Install door hardware gently to avoid stressing glass panes. Inside, add shelving, potting benches, or hanging hooks based on your growing needs.
For winter use, removable polycarbonate panels can be added to doors or vents to improve insulation without sacrificing light.
5 DIY Greenhouse Ideas Using Old Windows
Classic Box Greenhouse

This traditional design uses multiple old windows to create a simple rectangular structure. The greenhouse is essentially a box with windows forming all four walls and a sloped or flat roof.
This design works best when you have a collection of similarly sized windows, making assembly straightforward. The structure provides excellent light penetration from all sides and can be scaled to any size based on your window inventory and space requirements.
Mini Cold Frame with Hinged Top

Transform four old windows into a compact cold frame in just a few hours. Two windows form the side walls while plywood comprises the other two sides. The remaining two windows are hinged to create an easy-open top that provides access to plants inside.
This freestanding design is perfect for starting seedlings, hardening off transplants, or extending the growing season for cold-tolerant vegetables without committing to a full-size greenhouse.
Lean-To Greenhouse Attached to House
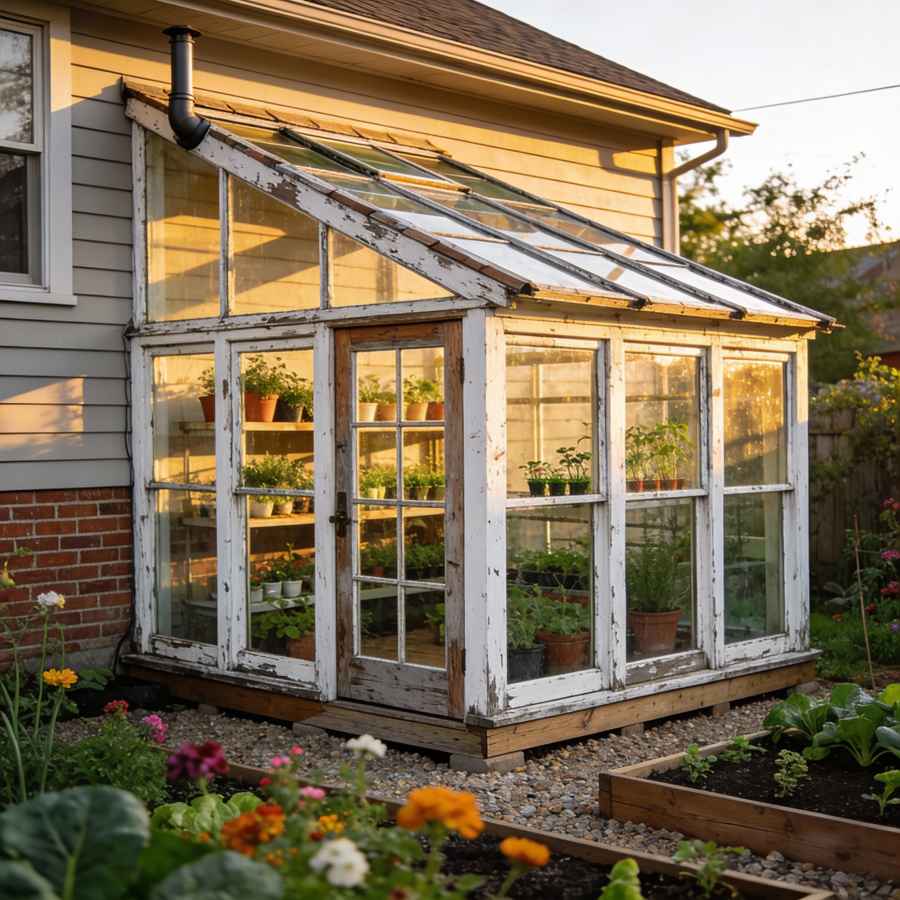
Build your greenhouse against an existing structure like a house or shed wall. This design benefits from the thermal mass of the building wall and requires fewer materials since one side is already complete.
Angle the roof to continue the water flow from your house roofline while maximizing solar potential. This configuration provides easy access from your home and can incorporate passive solar heating principles for year-round growing.
Repurposed Door and Window Combo

Use an old door as the front entrance combined with miscellaneous windows for the remaining walls. French doors with glass panels work particularly well for this design, adding character while providing light and access.
Frame the structure with reclaimed lumber to create a charming, rustic greenhouse that makes efficient use of various salvaged materials. This approach is ideal when you have mismatched windows of different sizes.
Large Walk-In Greenhouse with French Windows
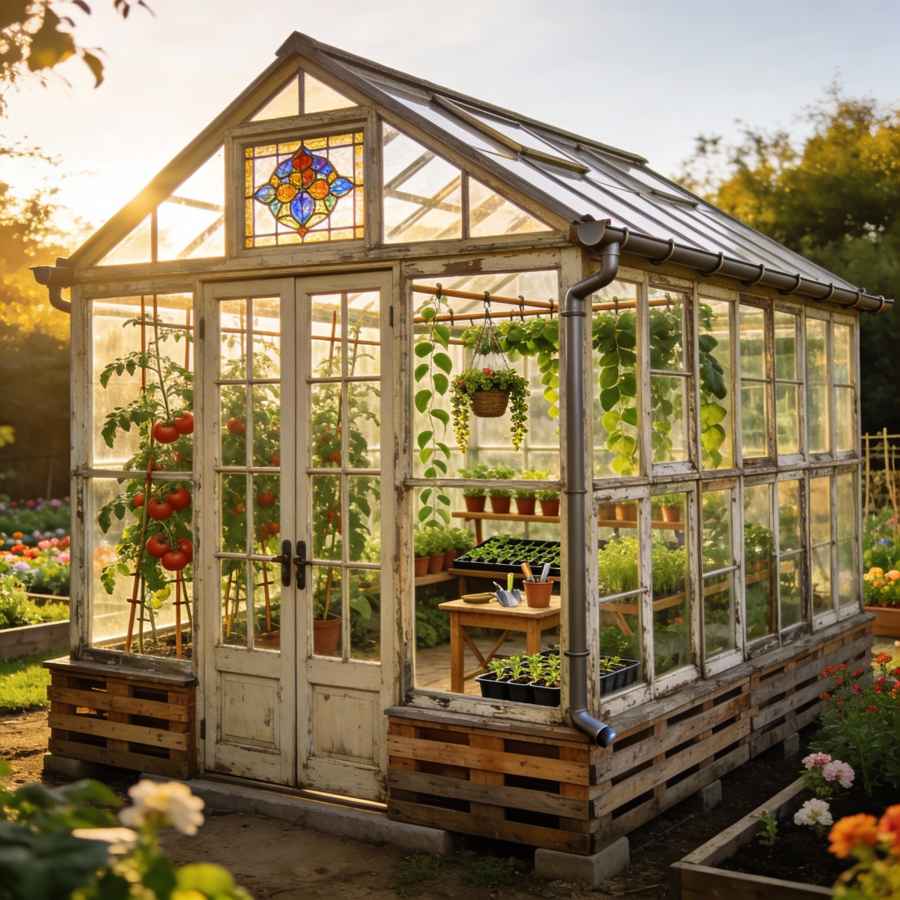
Create a substantial greenhouse using 20-24 windows of various ages and designs. Incorporate matching French windows for the front entrance and decorative elements like leaded light panels in the gable end.
Set windows on pallet wood walls for the sides and back, and include guttering for rainwater collection. This ambitious design provides height for climbing plants, ample working space, and serves as a decorative garden centerpiece.
Also Read: How to Build Chicken Coop Out of Pallets?
Conclusion
Building a greenhouse from old windows turns discarded materials into a productive, beautiful growing space. While it requires patience during the collection and planning stages, the result is a durable, light-filled structure that extends your growing season at a fraction of the cost of commercial greenhouses.
Whether you opt for a small cold frame or a full walk-in greenhouse, this project blends sustainability, creativity, and practical gardening—making it a perfect fit for eco-conscious gardeners and content creators alike.

Khaja Moinuddin, a computer science graduate, finds joy in gardening and homesteading. Join him on this blog as he shares his experiences in homesteading, gardening, and composting