Chicken coop represents more than a shelter for your flocks. With all the fluffy feathers chickens have, they are still sensitive to cold.
Well, there are chicken breeds that can tolerate winter, but as a chicken keeper you must know how cold is too cold for your flocks.
If you’re living in a region with harsh winters, then should insulate the chicken coop from frost and wind chill.
Using a heating lamp is one of the popular ways to keep the chicken coop warm at night. But most chicken growers would like to try more natural way to winterize chicken coop.
9 Ways to Winterize Chicken Coop
Basically, these birds are native to Southeast Asia. Yes, they are tropical native birds that need warmth.
Though they have adopted over thousands of years, they are still haven’t shed their tropical roots.
When the temperature drops below freezing point, then your birds might have serious problem.
As the temperature drops further at night, it is important that you prepare the chicken coop for cold weather.
1. Add Proper Insulation
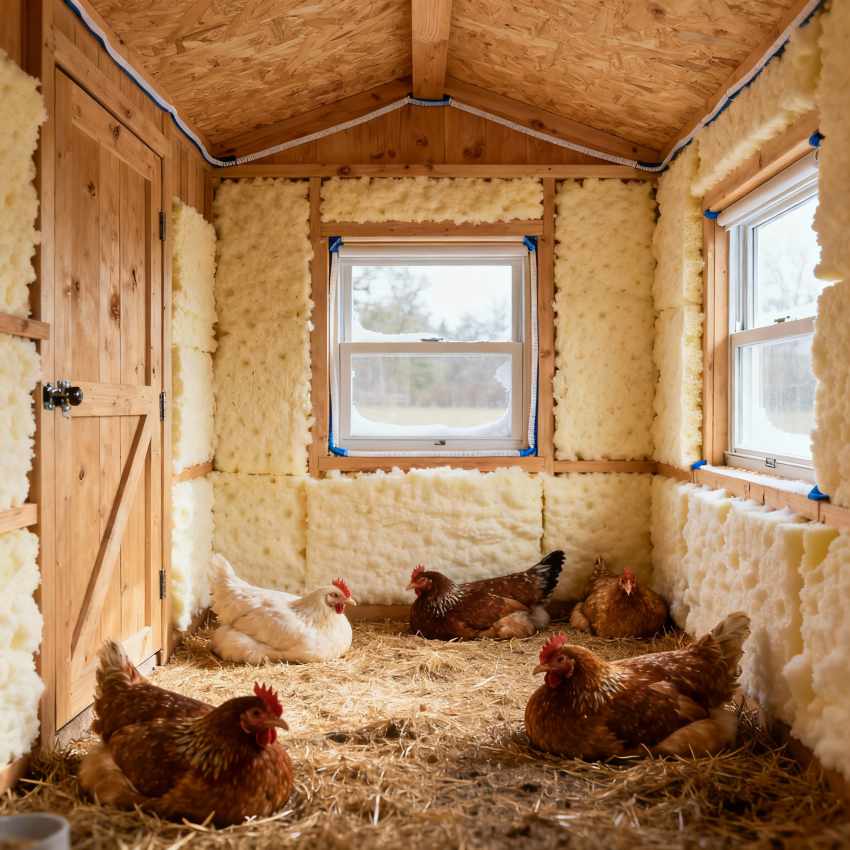
A well-insulated chicken coop is the first and most important step in preparing for winter. It helps retain the natural body heat your chickens generate and prevents icy winds from seeping through weak spots. Even hardy breeds feel the chill when temperatures drop below freezing.
You can use a variety of materials to insulate the coop effectively.
Choose whichever fits your budget, climate, and coop design.
Common insulation options include:
- Foam boards for long-term insulation
- Straw bales stacked along outer walls
- Shredded paper or cardboard layers
- Recycled wool, blankets, or old rugs
- Bubble wrap on windows to reduce heat loss
Always cover insulation with plywood or boards so the flock doesn’t peck or ingest it.
Exposed insulation can be harmful and won’t last the entire season.
Focus most of your attention on the walls and ceiling.
These areas lose the most heat and benefit greatly from an extra layer of protection.
The north-facing wall deserves extra care because it takes the strongest winter winds.
Adding straw bales or an exterior panel reduces wind chill inside the coop.
While insulating, remember that chickens still need ventilation.
A fully airtight coop traps moisture, leading to frostbite and respiratory issues.
Aim for a balance—warm but not sealed, insulated but still able to “breathe.”
Keep vents high near the roofline so air circulates without creating drafts.
With proper insulation installed, the coop stays drier, warmer, and far more comfortable.
This simple upgrade helps your flock conserve energy and stay healthier all winter long.
2. Improve Ventilation
Ventilation is often misunderstood in winter care, but it’s one of the most crucial elements for a healthy coop. Chickens produce a lot of moisture through breathing and droppings, and when that moisture gets trapped, it turns into condensation. This damp air settles on combs and wattles, sharply increasing the risk of frostbite even if the temperature is not extremely low.
Good ventilation allows humid air to escape without letting cold drafts hit the birds directly. It keeps the coop dry, lowers ammonia odors, and maintains cleaner, healthier air throughout winter. To achieve this, keep the vents open year-round, even during cold weather. Place ventilation openings high near the roofline so air can move above the chickens while they roost.
Use secure materials like hardware cloth on the openings to allow airflow while keeping predators out. Avoid closing vents during storms, because trapped moisture is far more dangerous to chickens than cold air itself. The goal is to let warm, moist air rise and exit naturally while allowing a gentle flow of fresh air inside.
A properly ventilated coop feels warmer, drier, and far more comfortable. With the right airflow, your chickens can handle winter conditions safely and stay healthier through the cold months.
Also Read: How to Build a Chicken Coop for 20 Chickens?
3. Deep Litter Method
The deep-litter method creates a naturally composting floor that generates gentle warmth during winter. As the bedding slowly breaks down, it releases heat that rises through the coop and helps keep the environment more comfortable for your flock.
Begin with a thick base of pine shavings, straw, or dry leaves. Add fresh bedding every week so the top layer stays clean and absorbs moisture. Avoid doing a full clean-out during winter; instead, remove only wet or heavily soiled spots. This allows the composting process to continue undisturbed and maintain steady warmth.
By the time spring arrives, the coop floor will have turned into rich, ready-to-use compost. It’s one of the simplest, warmest, and most low-maintenance winterizing methods for chicken keepers.
4. Seal Cracks and Block Drafts
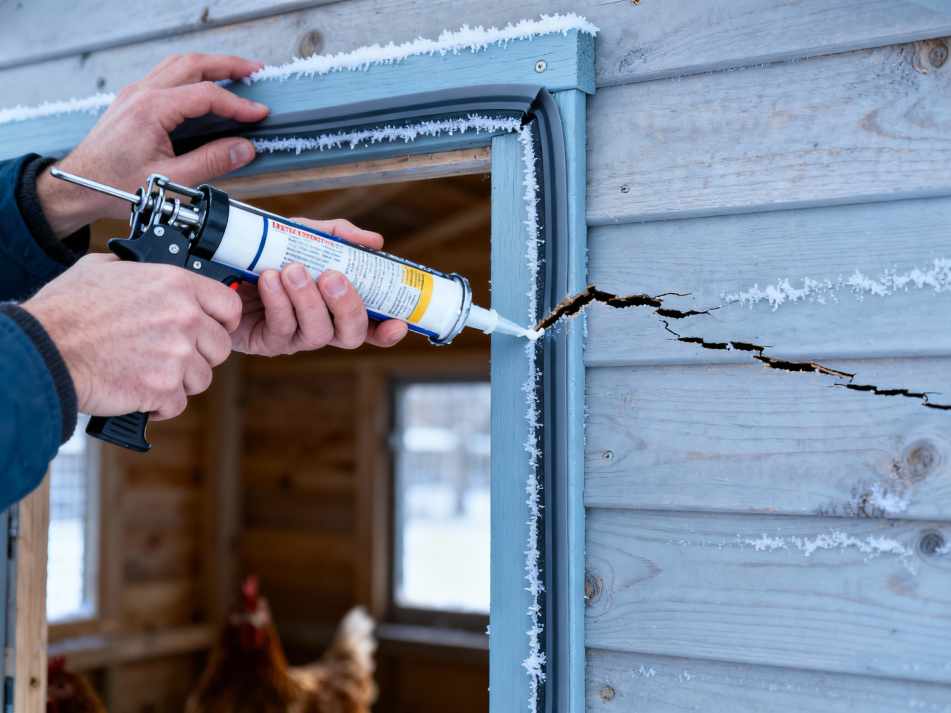
Drafts are one of the biggest hidden problems in winter. Even a small gap can let freezing air sweep across the roosts, chilling your chickens and increasing their risk of frostbite. That’s why sealing cracks is a key part of winterizing the coop.
Start by doing a slow walk-around, checking every corner of the structure. Look closely around windows, doors, roof edges, and flooring gaps. Use simple materials like caulk, wood strips, insulation tape, or weather-stripping to close these openings.
Focus especially on the north and west sides of the coop, since these areas usually face the harshest winter winds. A few strategic fixes can make a big difference.
Remember, draft-free does not mean airtight. The coop still needs ventilation, but eliminating sharp gusts keeps your flock warmer, safer, and far more comfortable through winter.
5. Winterize the Roosts
Roost placement plays a huge role in keeping your flock warm during winter nights.
Chickens trap heat by fluffing their feathers, but they rely on wide wooden roosts—at least 2 inches across—to fully cover their toes. This simple detail helps prevent frostbite and keeps them comfortably insulated.
Position the roosts higher than the nesting boxes so the birds can take advantage of rising warm air. Make sure they’re placed away from windows, vents, or any area where drafts may blow directly onto them.
A dry, elevated, and draft-free roost creates a cozy resting space and allows your flock to stay healthier and more resilient through freezing temperatures.
Also Read: How to Build Chicken Coop Out of Pallets?
6. Use Windbreaks Around the Coop

Cold winds can drastically lower the temperature inside the coop, even if you’ve added insulation. Creating windbreaks around the structure helps block these harsh gusts and reduces overall heat loss during winter.
You can use several simple materials to build effective wind barriers:
- Stack straw bales along the wind-facing sides of the coop
- Attach temporary plywood sheets or PVC wind panels
- Plant dense shrubs or position wooden pallets nearby
- Use tarps only if they are tightly secured to avoid loud flapping
Always place windbreaks a few inches away from the actual coop wall to prevent trapping moisture. This protective buffer shields the coop from wind chill and makes the interior significantly warmer and more comfortable for your flock.
7. Keep Water From Freezing
Chickens can handle cold temperatures, but they cannot go without fresh, unfrozen water. Heated water bowls, heated bases, or even simple rubber tubs can slow ice formation and keep water accessible on freezing nights. Keeping the waterer outside the coop helps reduce humidity inside, which lowers the chances of frostbite.
Refresh the water with warm water each morning and check it again in the evening to ensure it hasn’t iced over. With a dependable winter water setup, your chickens stay properly hydrated and far healthier throughout harsh winter conditions.
8. Ensure Dry Bedding and Clean Nesting Boxes
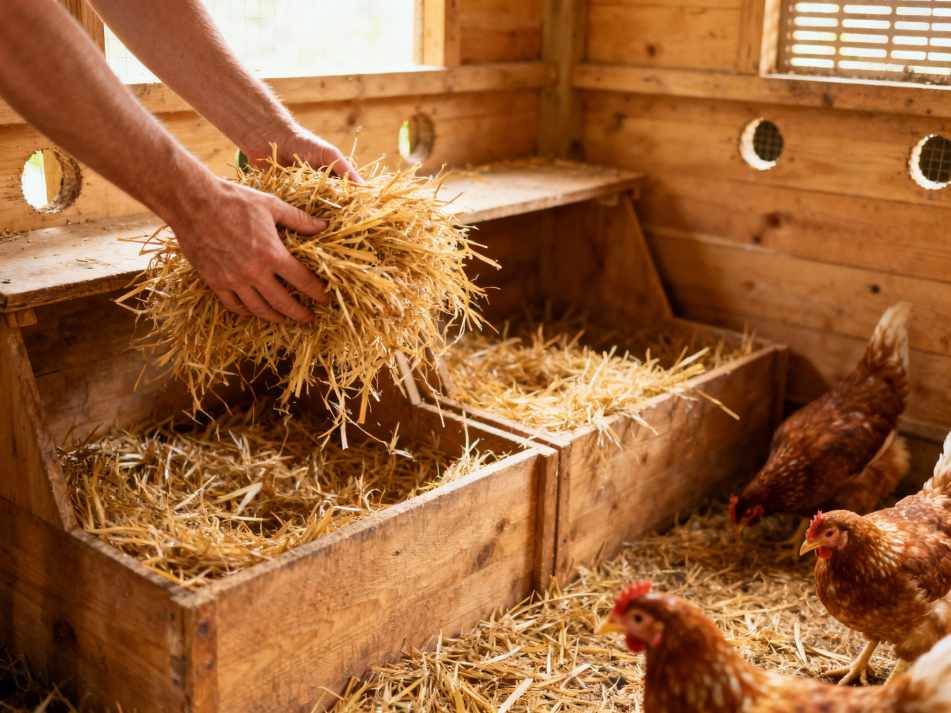
Wet bedding chills chickens quickly and traps moisture inside the coop, raising humidity levels. This creates the perfect conditions for frostbite and respiratory issues during winter.
Replace any damp or moldy bedding as soon as you notice it and keep nesting boxes filled with a thick, dry layer of straw. Removing droppings often also helps reduce ammonia and keeps the coop healthier.
Elevate nesting boxes slightly for better airflow and always keep extra dry bedding on hand for quick refills. Dry bedding means warmer bedding, helping your hens stay comfortable and continue laying through the cold months.
Also Read: 19 Cold Hardy Chicken Breeds that Tolerant Winter
9. Provide Supplemental Heating Only If Necessary
Heating lamps may seem like an easy way to warm the coop, but they can be very dangerous and often cause fires. Only use heat when it is extremely cold or if you have birds that cannot handle the cold, like chicks, older hens, or sick chickens.
If you do need extra heat, choose safer options such as radiant heat panels or ceramic heaters. These warm the coop gently without bright light or high fire risk.
Make sure any heater is installed safely, tightly secured, and placed far away from bedding or anything that could catch fire. The goal is to help your chickens stay warm without putting them in danger.
Conclusion
Winterizing your chicken coop means keeping it warm, dry, and well-ventilated while reducing drafts and moisture. Simple steps like adding insulation, managing bedding, and blocking wind help create a safer space for your flock.
Each improvement makes the coop cozier and healthier during freezing temperatures. With all nine steps in place, your chickens stay warm, comfortable, and ready to thrive until spring arrives.

Khaja Moinuddin, a computer science graduate, finds joy in gardening and homesteading. Join him on this blog as he shares his experiences in homesteading, gardening, and composting